Showing posts with label crafts. Show all posts

Wednesday, September 21, 2011

Random Acts of Kindness


My son loves lollipops. He sticks out his tongue and puts the pop on his tongue to get a taste. It takes FOREVER for him to get through a Dum Dum pop because he hasn't learned to put the whole thing in his mouth. How come everything at this age is adorable?

So when I saw this download, I knew I had to make these for his daycare class.


All you need are:
- Lollipops (I used Dum-Dums because they are smaller for 2 year olds)
Lollipop printable
- Scissors
- Pencil or some other thin tool like a water color paintbrush
- Basket
- Paper filler or tissue paper


  1. First, print out the flowers and cut them out.
  2. Then use the end of your scissors to poke a hole in the center and insert the pop.
  3. Take your pencil or I used the end of a thin paintbrush and curl the ends of the petals. This just added a little interest for me. I made 20 multipled by 8 petals was 160 petal curls! UGH! But I do this in front of the TV as I watch shows so it isn't as painful as it sounds! 
  4. Line your basket or pot with tissue paper or shredded stuffing. Green would have been predicable so I used white tissue paper and put pink shredded filler on top. 
  5. Then I arranged the pops into a bouquet.
NOTE: I first tried to arrange them in a $1 rectangle pot with styrofoam ball cut in half. I found that the popsicle sticks were too short and since I had 20 pops the pot wasn't big enough once they were arranged. This would have been perfect if I had less.


I love this idea because it reinforces sharing and patience. My son wanted them NOW. I had to keep telling him it was for his friends at school and that he needed to share. No special occasion just a sweet surprise and cost me close to nothing. I had bought the bag of pops a while ago (under $3). The basket and tissue paper I had on hand. Can't beat that.
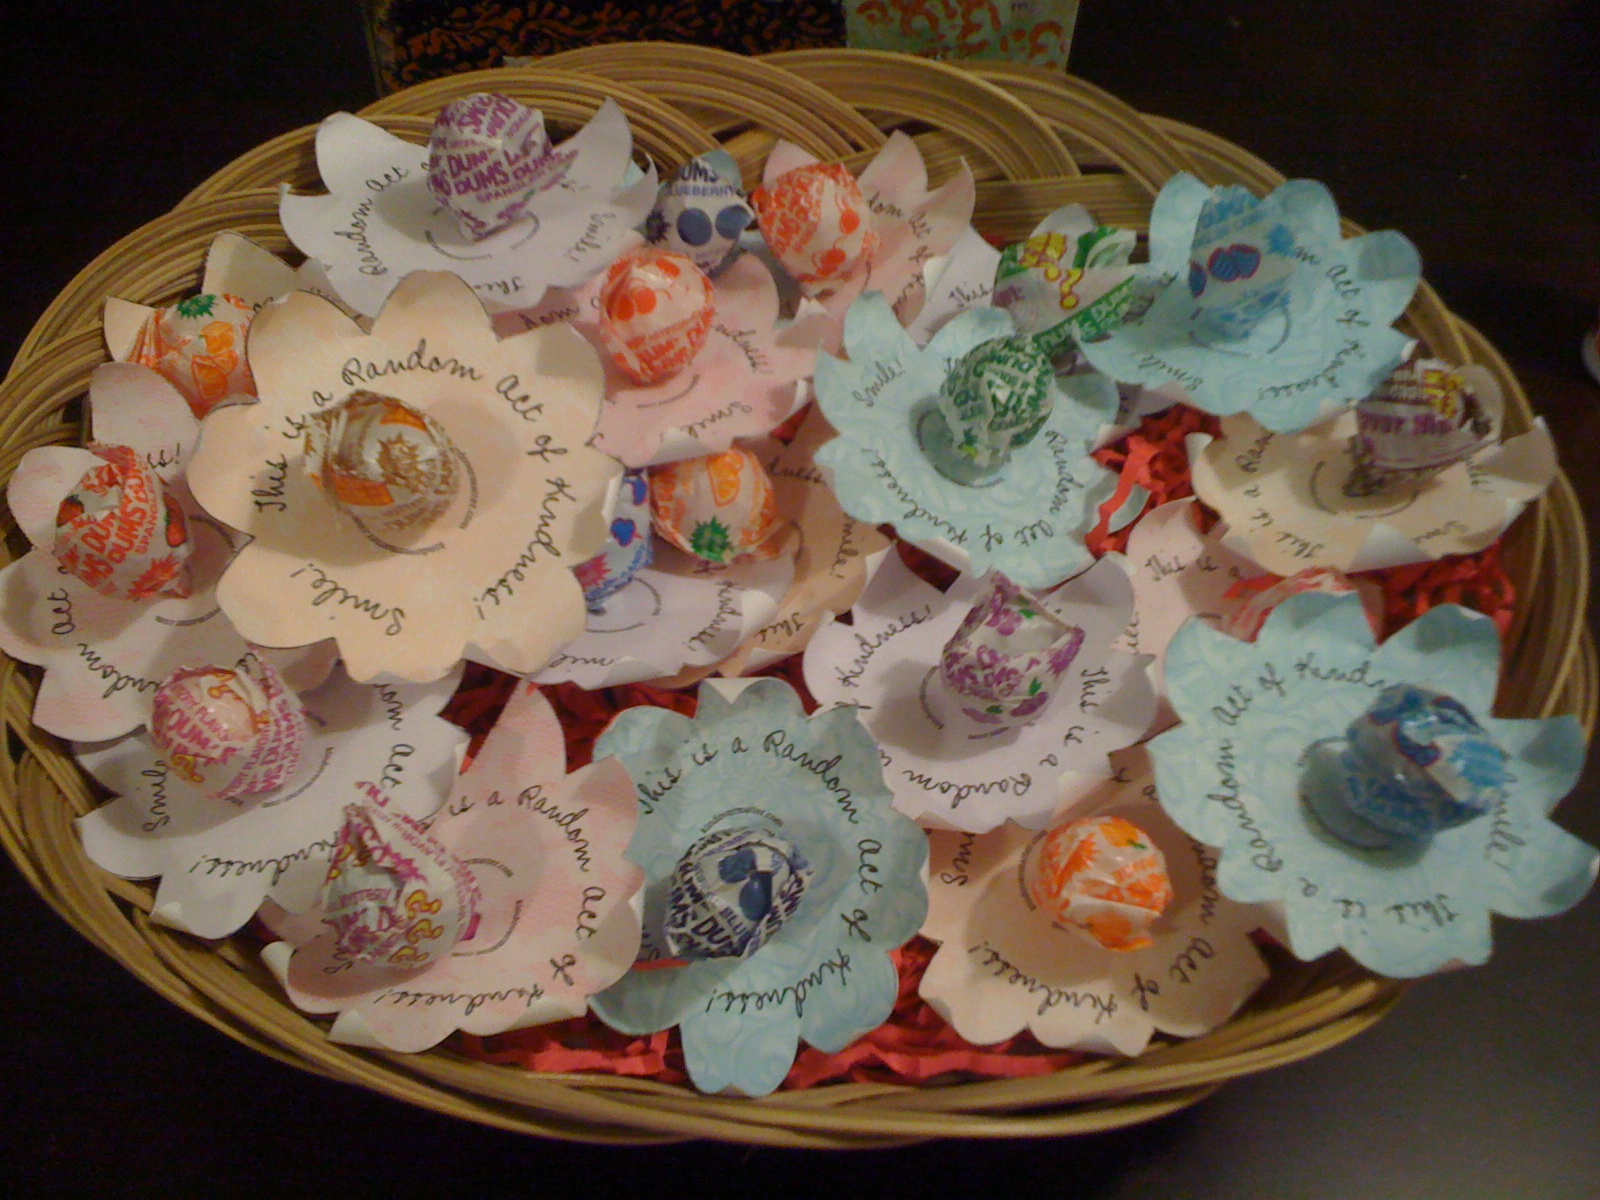
I hope this brings a glimmer of sunshine on this dreary rainy day to the little kids. Hopefully for the ladies at daycare sake, all the kids eat these way quicker than my son does! These little treats might last all day!

Spread some random acts of kindness today!

Friday, September 9, 2011

Thrift Store Treasures

I love going to the thrift store and finding hidden treasures with potential. On a recent trip I found this beauty >>>

I paid $4.97 for something that was $29.95 at Target and the price tag is still on it! So much potential here! I envision this with butterflies all over it! Still deciding if I should spray paint it. I am addicted to spray paint!

I also like to pick up glass vases to have on hand for impromptu presents. These are the same vases that you pay $10+ when you have flowers delivered. I pay $.25 each, go to the grocery store to buy flowers and add a ribbon on the vase - DONE. So much better than handing someone store bought flowers. They won't know the difference and I have found that people don't like to arrange flowers - MOM. ;) So help them out by doing it for them!

Here is another project I picked up at the Thrift store. I paid $1.97 and in Michael's I saw these for $5+ depending on size. My vision was to paint something on it to add to my display shelves. I was perusing Michael's and found the stencil "Home". Though I don't like jumping on the Chinese symbol bandwagon, it was a perfect fit and interesting. Add to cart. $3.29 and I will use this again. The spray paint I had on hand of course! {Claret Wine}
I had to be careful when spray painting because the force of the air moved the stencil. I also found that even though I used a dark spray it just wasn't crisp or bold enough for me. So I took a black Sharpie and traced the stencil to give it definition. Here is my finished product.


I just love the natural elements of nature. Viola! What treasures are you finding?

Also in the picture > The frames were on clearance at Bed, Bath and Beyond for less than $5 each. The ladder is old school Potterybarn (also clearance and I worked there so 40% off SCORE!). The glass vase and flowers - The Dollar Tree. 

Wednesday, September 7, 2011

Tag Tuesday

So here is Tag Tuesday on Wednesday! Is anyone else a day off? Having a holiday in the work week throws my whole schedule off. The good part is that I was able to sneak away and chip away at my Christmas list. Yes, I am working on my Christmas gifts already! I am on a mission to have them all bought/made and wrapped by Thanksgiving. Ok, well how about all bought/made not wrapped :}. I am trying to make all my gifts this year. I feel that it means so much more because of all the time and thought that goes into it. So since I have been planning for gift giving, these tags really caught my eye. I am a sucker for anything that says handmade....rub-ons, stamps, stickers, tags. 


Personalize these @ Creative Mamma

http://tipjunkie.com/ is a great place to go to get free printables and gift ideas. She links to other blogs so you can easily find other blogs that will peak your interest. I get lost in blog world........
Handmade Tags
So print these out, grab your scissors, punch holes and wrap some twine around them and you have them all ready to attach to a special gift. One thing I have learned is to always have a stockpile of gifts on hand for a last minute gift.
Go get lost and Enjoy! 

Thursday, September 1, 2011

Scrabble Family Frames

Well, the one benefit of the hurricane was that my cabin fever was kept at bay with my long wish list of craft projects. One quick project that anyone {and I do mean ANYONE} can do! These make great gifts - or you just might want to keep it for yourself.

Here is what you need:

  • 8" x 10" frame
  • a piece of scrapbook cut to 8" x 10"
  • Scrabble tiles {I purchased mine on eBay}
  • Glue - I used Zip Dry Glue or Scotch Glue - you could use a hot clue gun but I am allergic to those things!
  • Any embellishments you have on hand


Take the glass out of the frame and assemble your frame with the scrapbook paper where your picture would be.

Select your tiles for your family's names - Don't forget the last name!

So the hardest part was linking all the names together so that they fit in the 8x10 frame. It amazed me how many ways I could rearrange them!

One of my frames I actually spray painted white to match my neighbor's theme. I liked the fact that the frame had letters also. That really tied into the Scrabble theme.

Once you have them arranged and centered where you want them to appear, it is time to glue. Glue each tile down. All of the recommended glues dry clear so you don't need to worry about leakage.

Once they are dry you can either add your embellishments for a 3D effect or simply reassemble with your glass in the front. If you do this, you will need to take out one of the cardboard fillers since the scrabble tiles are bulkier than a picture.

Viola!


Linked up here > > Somewhat Simple

Friday, August 19, 2011

Easy Outside Art

I love browsing through the dollar store and finding items to alter into something fabulous. I found these ugly [in my opinion] wall plaques. I had thought they would be perfect to adhere a photo to and Mod-Podge over it for a floating photo effect. So I bought a couple to experiment and they sat in my scrapbook room.......Until, my girlfriend Cathy told me about these photos that she and her husband had taken that she wanted to use on her covered deck. Her daughter-in-law suggested to use the bird pics, I came up with the project and Cathy was the brawn. Since it is outside but is covered from most of the elements (mainly water) I thought the Mod-Podge seal would be perfect.

So one Friday, Cathy printed 4 - 8x10 photos of her birds and we got started!

All you need is:

  • foam brush
  • Mod Podge in matte finish
  • 8x10 picture - trimmed to match the size of your board
  • picture board - I got mine at the Dollar Tree in the frame section


1. Paint Mod Podge on the
board
2. Position the photo on the
board

3. Smooth out the photo so
there aren't any bubble
4. Paint Mod Podge over the
photo, edges and back to seal.

5. Let the pictures dry. 
6. Cathy's Margaritas was how
we passed the time! YUM!

 Voila! Cathy hung them with the 3M picture hangers. How Awesome does that look? Go here for the link to the coupon to save! 
So cute! All for under $4 each! I am going to take beach pics and do this for my sunroom! I can't wait! Thank you Cathy for being my guinea pig! :) SMOOCHES

Wednesday, August 10, 2011

Cozy Corner


Short and sweet!
3-3x3 mini frames from Target Hot Spot for $2.50.
One pic of each family member.
Our little coat corner.
Okay, so it is monopolized by Kyle's hats!
I hang everything using the 3M picture hangers. They even work on our plaster walls! 
[get coupons here - this is for you Steph!]


 Come hang your coat - or hat here if you are in the neighborhood!